
These are the settings that were used to calibrate our Sony XBR55X900E TV, and we expect these also to be applicable for the 49" version (XBR49X900E), the 65" (XBR65X900E) and 75" version (XBR75X900E). The following settings are suitable for any content, from watching movies to TV shows and gaming. For Gaming, some little adjustments need to be done, and they are listed below.
General Settings

For movies and TV content, we selected the 'Custom' 'Picture Mode', since it is the picture mode that gave us the closest result to our calibration goal and it brings the image quality close to what the content creator intended it be.
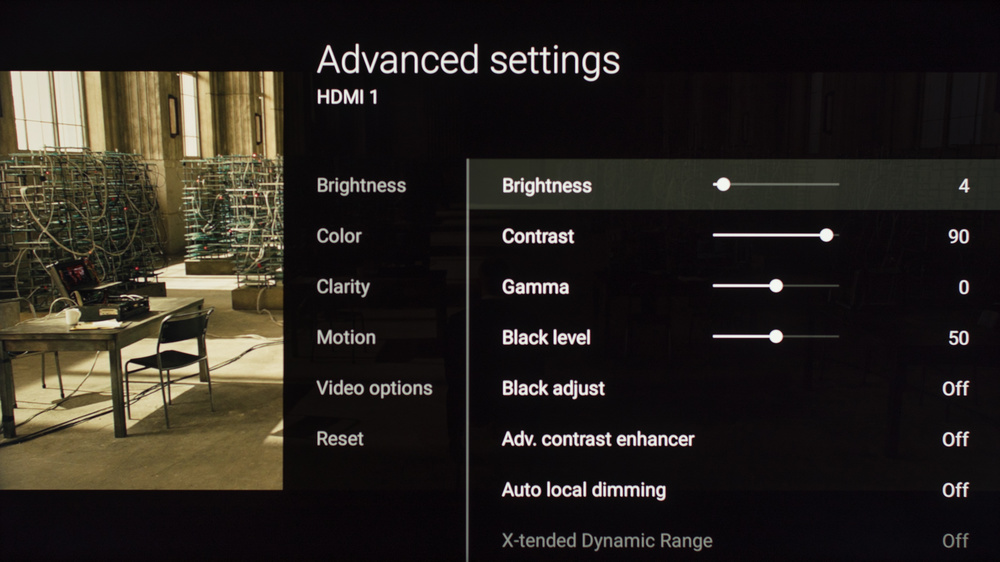
In the 'Brightness' tab, we set the 'Brightness' to 4 to get a luminosity level closest to our calibration target of 100 cd/m². Note that here the 'Brightness' is the equivalent of what other companies call 'Backlight'. The 'Brightness' can be changed to match your room lighting, and it won't affect the picture quality. We left the 'Contrast' to 90, the 'Gamma' to 0, and the 'Black level' to 50, their default values. The 'Black adjust' and 'Adv. contrast enhancer' were left turned off, since we don't want to add any image processing. Note that for the calibration, we turned off the 'Auto local dimming' and 'X-tended Dynamic Range', but you should turn on these features for normal TV and movie viewing.

In the 'Color' tab, we left at the default value of 50 for 'Color' and 0 for 'Hue'. We selected 'Expert 1' for the 'Color temperature' as this is the closest to the warm temperature of 6500K we are trying to achieve during calibration. If you find the color temperature to be too warm (reddish or yellowish) you can set it to a colder temperature. 'Live Color' was also left turned off, once again because we do not want to add extra image processing.

In the 'Clarity' tab, we left 'Sharpness' to 50 (the default value) since we did not want to have any oversharpness. 'Reality Creation' was also left turned off. It could be turned on if you are watching some older content with a lower resolution since it can help to improve the quality of the image. You can adjust with the 'Resolution' slider how much effect you want to be added. The 'Mastered in 4K' option is a feature that will optimize the upscaling of 1080p Blu-rays movies that are listed as being 'Mastered in 4K'. It will not be possible to apply this setting if you are not watching a movie through other means than via a Blu-ray player, so in our case, we did not use this feature. 'Random noise reduction', 'Digital noise reduction' and 'Smooth gradation' were all left turned off, but those could be useful to ameliorate the quality of older and low-resolution content. 'Smooth gradation' is especially useful if you see a lot of color banding normally seen in 8-bit content since it will smooth the 8-bit gradation to make it look much better with less visual banding.

In the 'Motion' tab setting, we left the 'Motionflow' and 'Cinemotion' turned off, but if you like the motion interpolation (or commonly named the soap opera effect), simply adjust the 'Motionflow' setting to 'Custom' and increase the 'Smoothness' slider. The 'Clearness' slider controls the image flicker control of the TV. To know more about this feature you can click here. If you are watching a movie via 60p/60i and notice some judder, simply set 'Motionflow' to 'True Cinema' and 'CineMotion' to 'High' to have a judder-free experience. This doesn't add any soap opera effect.
HDR Settings

When HDR content is detected the TV should switch automatically to the good settings, but if you want to be sure you can verify that the 'Brightness' is set to max, that ' Auto local dimming' is set to 'High' and that 'X-tended Dynamic Range' is set to 'High'.

In the 'Video options', just verify that 'HDR mode', 'HDMI video range' and 'Color space' are set to 'Auto' and it should change automatically to match the type of content you are watching, in this case, HDR content.
SDR Gaming and HDR Settings

For playing games via a video game console or PC (in SDR or HDR) simply choose the 'Game' 'Picture mode', and you can keep the general settings previously mentioned.
White Balance Settings
The following are the results of the white balance and colorspace calibration on our unit. They are provided for reference, and should not be copied as the calibration values vary per individual unit even for the same model and same size as the TV we reviewed due to manufacturing tolerances. If you want to try them you will need to enter all values shown, as all of them are active at the same time. If you end up with worse picture quality, simply reset them to the default values.


Recommended Articles


