
We used the following calibration settings to review the LG NANO80 75" (75NANO80UNA), and we expect them to be valid for the 49" (49NANO80UNA), 55" (55NANO80UNA) and 65" (65NANO80UNA) models too. These settings should apply to most types of content, except for gaming or use as a PC monitor, which require a few additional changes, listed below.
General Settings
Eco Settings

One of the first things we did was disable all of the Power Saving and automatic image modes, as we don't want the TV to adjust the image during testing. For this TV, we set Energy Saving to 'Off', and from the General menu we set AI Picture to 'Off', and we also disabled Eye Comfort Mode in the Picture menu. You should adjust these settings to your preference.
SDR


For SDR content, there are a whopping 10 preset picture modes. We recommend choosing the 'Expert(Dark Room)' Picture Mode, as it is the most accurate one out of the box, and allows for the most customization. If you watch in a brighter room, 'Expert (Bright Room)' is almost as accurate.
We recommend setting the Contrast to '80', Sharpness at '10', Color at '50', and Tint at '0'.
To adjust the TV's luminosity, you should adjust the Backlight setting depending on your specific viewing conditions. Changing this setting does not have any impact on the overall picture quality. The Brightness setting adjusts the image itself, and not the TV's luminosity. We usually recommend leaving this at '50'.
Expert Controls


In the Expert Controls tab, we left Dynamic Contrast and Super Resolution off for most of our testing. We left the Color Gamut set to 'Auto', so the TV will choose the proper color gamut depending on the content. We set the Gamma to 2.2, as that is our target gamma. We chose the 'Warm 2' Color Temperature, which was the default for some picture modes.
HDR


HDR is automatically enabled for the native apps. Once you start playing HDR content, some of the settings change automatically. We recommend leaving these settings to their default settings in HDR and to use the 'Cinema (User) Picture Mode.
For HDR to work from external devices, the HDMI Ultra HD Deep Color option usually has to be enabled from the 'Additional Settings' menu for the input you are using. Older devices may have compatibility issues if this option is left enabled, so it is recommended to only enable this setting for devices that require it.
How to make HDR Brighter
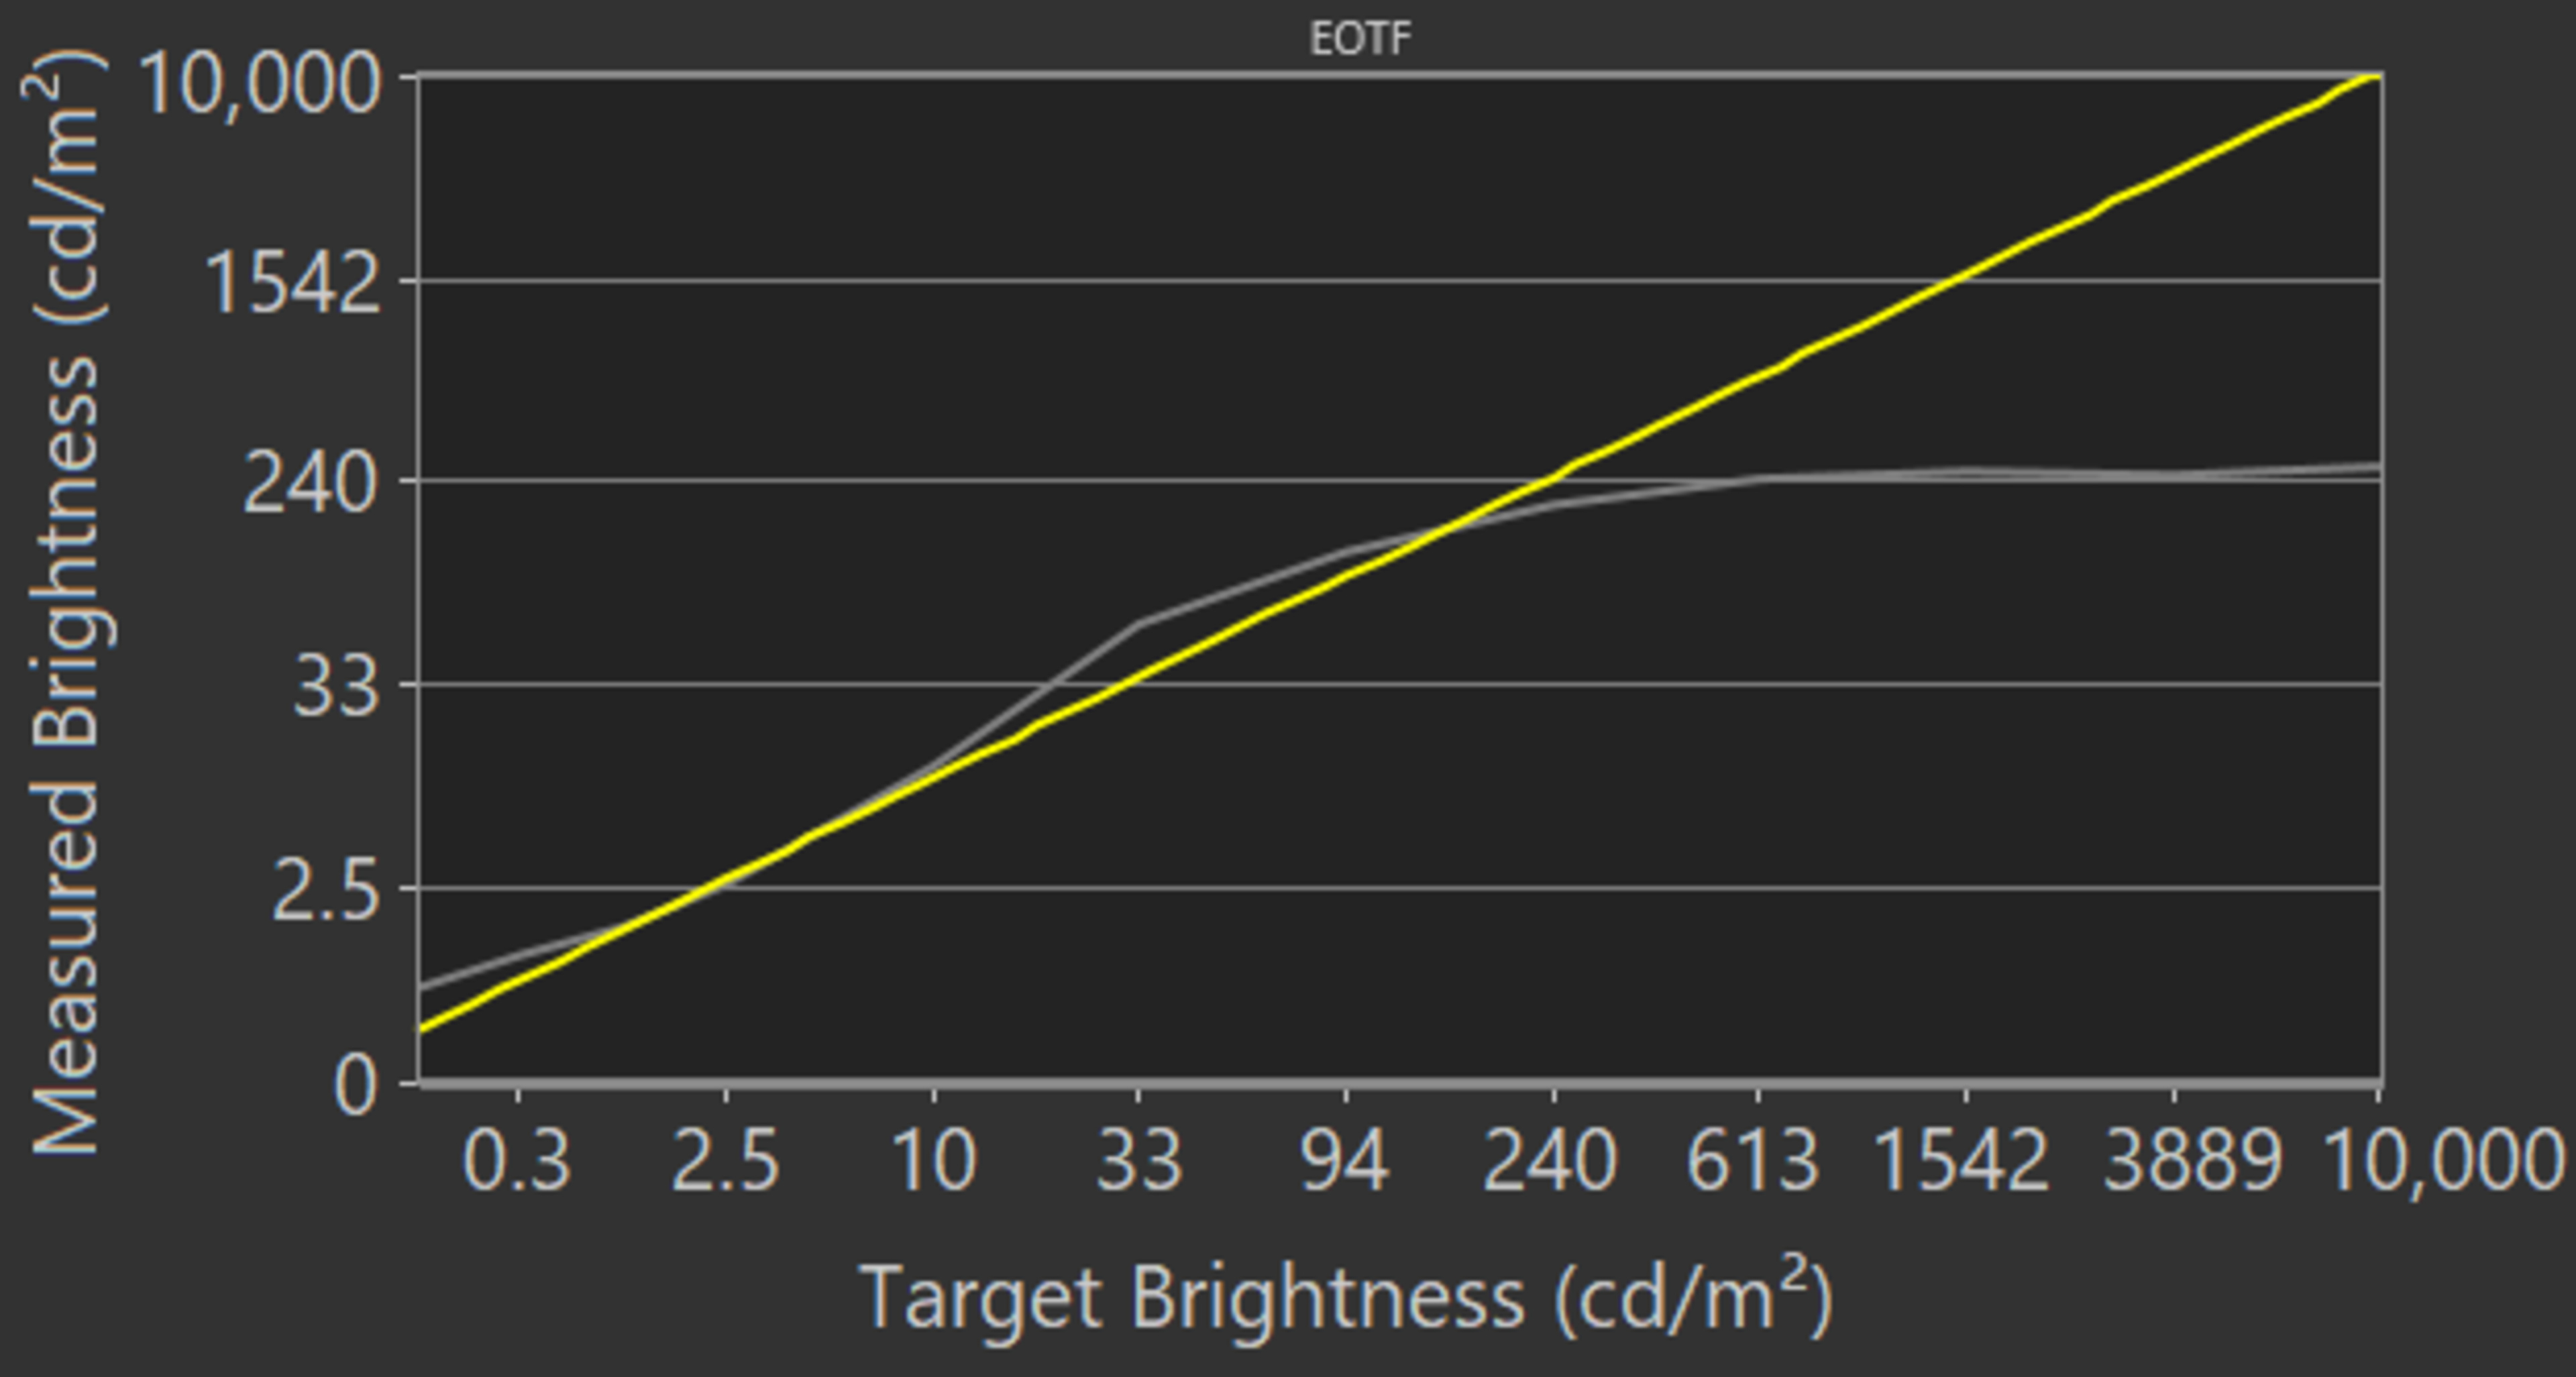
If you find HDR too dim and want the brightest image possible, enable Dynamic Tone Mapping, set Dynamic Contrast to 'High' with Brightness and Contrast at their max. The image is a bit brighter as you can see the EOTF here.
Motion Settings
Although we disable most motion enhancing functions for most of our tests, you should adjust these to whatever looks best for you. Some settings, like motion interpolation settings, may need to be adjusted depending on the specific content you are watching.
Motion Interpolation

Although we usually leave these settings disabled during testing, you should adjust these settings to your liking, as different people prefer different levels of motion interpolation. If you want to enable motion interpolation, set TruMotion to 'User', and set De-Judder to '10'.
Judder Settings

This TV is able to remove judder from native 24p sources. To do so, simply enable the Real Cinema setting from the 'Picture Mode Settings' menu.
Gaming

From the base SDR and HDR settings, very few changes are required for a great gaming experience. It supports Auto Low Latency Mode, which is enabled by enabling Instant Game Response from the 'Additional Settings' menu. Once this setting is enabled for the input you are using, the TV should automatically switch to the 'Game' Picture Mode when it detects a game is being played, and switch out of it when you stop playing.
For HDR Gaming, it is recommended to enable HDMI Ultra HD Deep Color for the port you are using, otherwise, you might have some issues. If Instant Game Response is enabled, the TV should do this automatically.
PC Gaming/Desktop use

For an optimal PC gaming experience and proper chroma 4:4:4 support, it is important to set the input label to 'PC' for the HDMI port you are using. Once you have set the label, it is recommended to reapply our base SDR or HDR settings, as the picture modes change when you set the label. This can be done from the new 'Home Dashboard' menu. Depending on the format you are sending, it might also be necessary to enable the HDMI Ultra HD Deep Color setting for the port you are using.
White Balance Settings
The following are the results of the white balance and colorspace calibration on our unit. They are provided for reference, and should not be copied as the calibration values vary per individual unit even for the same model and same size as the TV we reviewed due to manufacturing tolerances. If you want to try them you will need to enter all values shown, as all of them are active at the same time. If you end up with worse picture quality, simply reset them to the default values.


