
These are the settings we used to calibrate our 55" Hisense H9E Plus (55H9E Plus), and we expect them to be valid for the 65" H9E Plus (65H9E Plus) as well. The following settings are good for any content, from watching movies to TV shows and gaming.
Picture Settings

We left the Contrast, Color, and Tint to their default setting of '50', as these gave the closest results to our calibration targets. Sharpness was also left at 0, which is the default no-sharpness setting.

We chose the 'Calibrated' Picture Mode, as it provided the most accurate results. We set the Gamma to '3', as it provided the best results closest to our target gamma of 2.2.

For most of our tests, we left Local Dimming off. We also disabled the Automatic Light Sensor, as we don't want the screen to change during testing. A Backlight level setting of '21' was chosen for our calibration level of 100 cd/m². Most people will find this too dim, and you should adjust this. Note that the Backlight level setting has no impact on picture quality, you should adjust this to your liking.
Advanced Settings

In the Advanced Settings page, we left everything disabled, as we want the content to be closest to the creator's intent. Color Temperature was set to 'Low', as that gave the closest result to our calibration temperature of 6500 K. Noise Reduction and Digital Noise Reduction were set to 'Off'. These options can be adjusted to your liking to reduce noise from older, low-resolution content or from analog sources. Active contrast was left off, as we want the image to be as accurate as possible. Active contrast, when enabled, will adjust the contrast across the screen depending on the content displayed. Unfortunately, there is no option to reduce gradient banding.
Color Settings


Color space was left to 'Auto', as the TV will choose the best option depending on the source content.
The Color Temperature was set to 'Low', as that provided the most accurate color results for our chosen picture mode, and provided the color temperature that was the closest to our calibration target of 6500 K.
Motion Settings

Motion enhancement is the name for the motion interpolation feature, and it was left 'Off', as we don't want any added motion processing during our tests. The 'Film' setting can be used to remove judder from 24p sources without adding any motion interpolation.
HDR Settings

The picture modes are different in HDR and SDR. In HDR, the most accurate Picture Mode is 'HDR Standard', with the Color Temperature set to 'Low', and Local Dimming set to 'High'.
If you find the image is too dark in HDR, increasing the Contrast to '100' brightens the entire image. If that is still too dark, setting Active Contrast to 'medium' further increases the brightness of the entire image. You can see our measurements of these settings in the Color Gamut section of the review.
Other Settings
HDMI 2.0 format

The Hisense H9E Plus has two HDMI 2.0a ports, and two HDMI 1.4 ports. When connecting a high bandwidth device such as a game console it is important to set the HDMI 2.0 format to 'Enhanced'. This allows the device to use the full bandwidth of the port. There is no danger in always leaving this on, but some older devices may have compatibility issues.
Consumer Electronic Control (CEC)
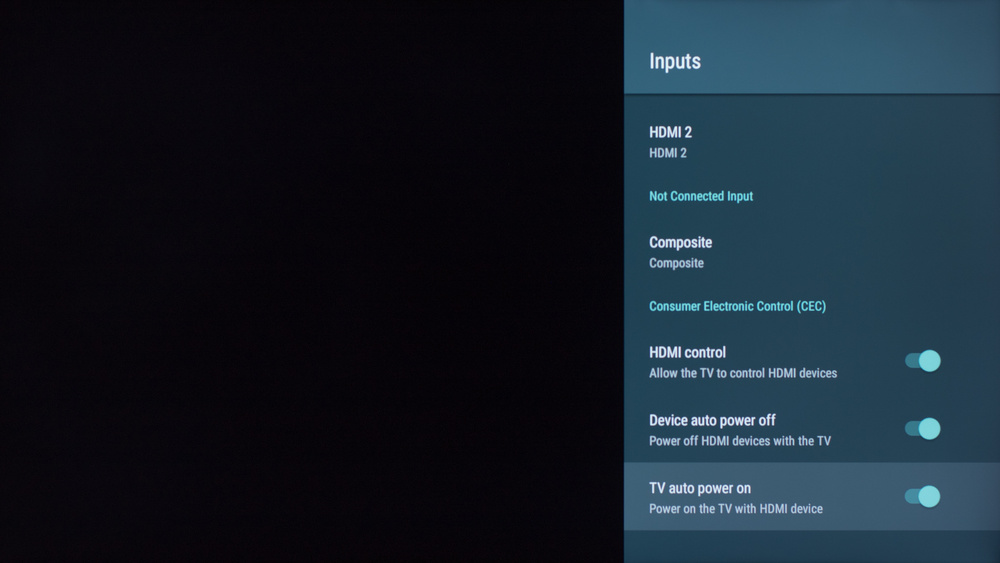
For the Audio Return Channel to work, the HDMI Control setting must be enabled under Consumer Electronic Control (CEC). The other options can be turned on or off according to your preference. Device auto power off allows your TV to instruct an external device to power off when the TV is powered off, this is especially useful for an audio receiver. The TV auto power on allows external devices to automatically power the TV on when they are turned on, this is mainly used for external playback devices like a Blu-ray player or game console.
Alexa device

The H9E Plus can be synchronized with an Amazon Alexa compatible device for added voice control functionality. The Alexa device menu is used to add and configure connected devices.
Additional Notes
During our testing we encountered a troublesome bug: some settings did not actually change despite toggling them in the menus. The only way to get the TV to change behavior was to toggle to a different setting, then back again to force it. For example: Playing an HDR clip from a Blu-ray player we found that the TV's local dimming was turned ON, but looked OFF and the brightness was much lower than expected. Toggling the Color Space setting to 'Native' then back to 'Auto' fixed both issues. Once exiting the clip back to SDR content, the menu had an elevated brightness that was fixed by toggling the Color Space setting once more. We also noticed issues with the motion enhancement setting staying active even if set to OFF. Toggling to a different setting, then OFF again fixed the issue.
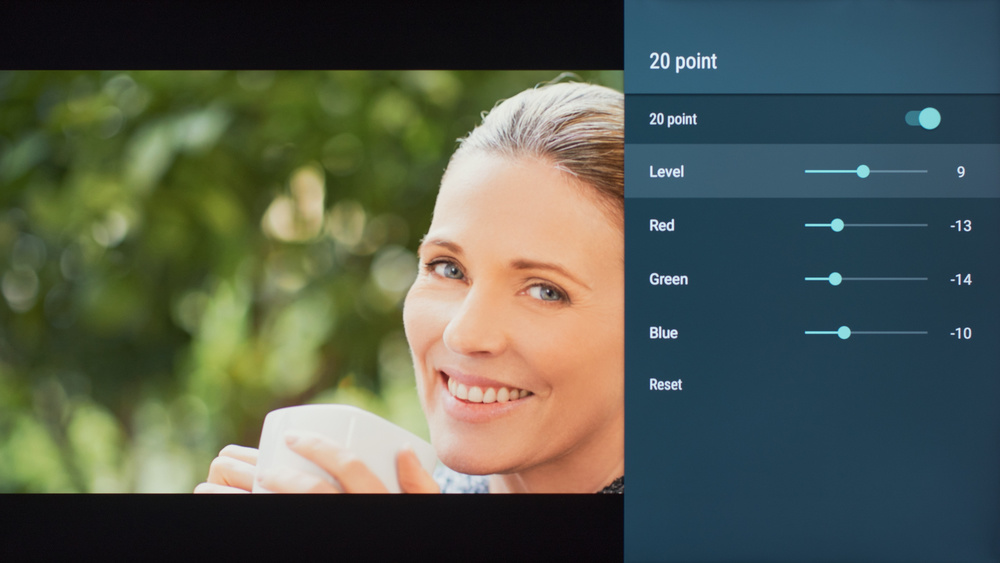
White Balance Settings
The following are the results of the white balance and colorspace calibration on our unit. They are provided for reference, and should not be copied as the calibration values vary per individual unit even for the same model and same size as the TV we reviewed due to manufacturing tolerances. If you want to try them you will need to enter all values shown, as all of them are active at the same time. If you end up with worse picture quality, simply reset them to the default values.


Recommended Articles


