
TCL 6 Series/R646 2021 QLED Calibration Settings
We used the following calibration settings to review the TCL 6 Series (55R646), and we expect our settings to be valid for the 65 inch (65R646) and the 75" (75R646) models. This TV uses TCL's implementation of Google TV, so there aren't any other TVs we've tested with the same settings menu.
These settings should apply to most types of content, except for gaming or use as a PC monitor, which require a few additional changes listed below.
General Settings
Eco Settings


One of the first things we did was disable all of the extra image processing features, as we don't want the TV to adjust the image during testing. We disabled the Energy Saver setting in the Power & Energy menu and disabled the Intelligent Picture settings.
SDR

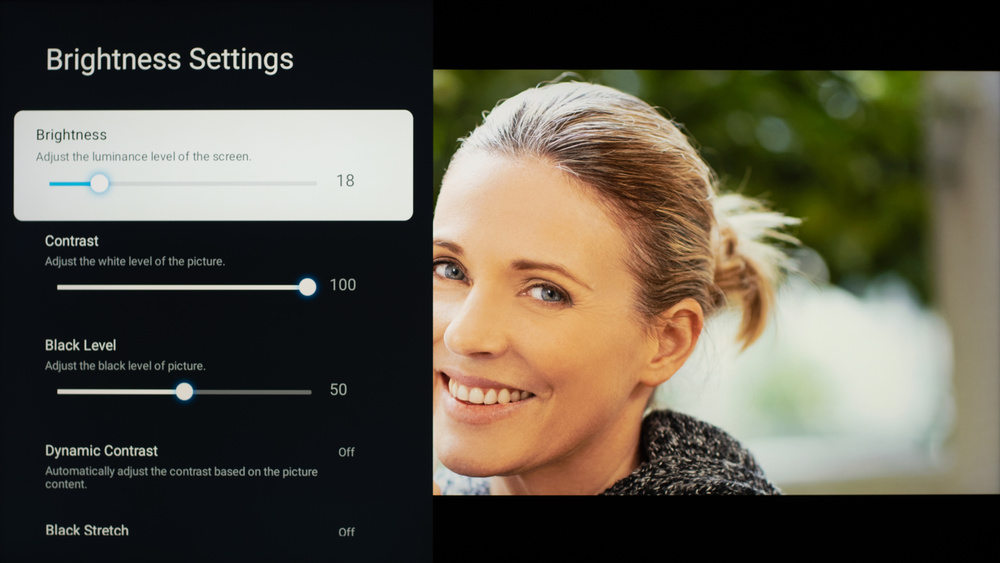


For SDR content, we recommend choosing the 'Movie' Picture Mode, as it's the most accurate one out of the box and allows for the most customization. In the Brightness Settings page, we recommend leaving the Contrast to '100', Black Level to '50', Gamma to '2.2', and we disabled Dynamic Contrast, Black Stretch, and Micro Contrast, but you can adjust these to your preference. The Local Contrast setting adjusts the local dimming feature, and we recommend 'Low'.
In the Color tab, we left everything at their default with the Color Temperature set to 'Warm -5'. In the Clarity tab, we left Sharpness to '0' and disabled the Digital Noise Reduction, Noise Reduction, and Gradation Clear settings, but once again, you should adjust these to your preference.
HDR


HDR is automatically enabled for the native apps. When you start playing HDR content, the picture settings menu changes to specify the HDR format. Once you start playing HDR content, some of the settings change automatically. We recommend choosing the 'Movie' HDR Picture Mode and leaving the other settings to their defaults in HDR. You have to set the HDMI Mode to 'HDMI 2.1' for the input you're using for full bandwidth signals.
Dolby Vision
The TCL 6 Series/R646 supports Dolby Vision from native apps and with most external devices. As with normal HDR content, when you start playing Dolby Vision content, some settings change automatically. We recommend leaving these settings as-is, do not copy our SDR settings over.
Motion Settings
Although we disable most motion enhancing functions for most of our tests, you should adjust these to whatever looks best for you.
Black Frame Insertion

The TCL 6 Series/R646 has an optional backlight strobing feature, commonly known as black frame insertion. It only flickers at 120Hz, and to enable it, enable the Motion Clarity setting so that you can enable the LED Clear Motion.
Motion Interpolation

The TCL 6 Series/R646 can interpolate lower-frame rate content up to 120 fps. Adjust the Blur Reduction and Judder Reduction settings to their max for it to work.
Judder
The TCL 6 Series/R646 can remove 24p judder from any source, and there aren't any settings you need to adjust for it.
Gaming Settings


From the base SDR and HDR settings, simply enable the Auto Low Latency Mode setting from the Inputs menu. This allows the TV to automatically switch into Game Mode when you launch a game from a compatible device. You can also set the Picture Mode to 'Game' for low input lag. For signals that require full bandwidth, you have to set the HDMI Mode to ' HDMI 2.1'.
Variable Refresh Rate

The TCL 6 Series/R646 supports variable refresh rate to reduce screen tearing when gaming. To use VRR, enable Variable Refresh Rate.
PC Gaming

If you want the TCL 6 Series/R646 to display chroma 4:4:4 when using it as a PC monitor, set the Picture Mode to 'PC' and set the HDMI Mode to '2.1'. You can also get low input lag by setting it in Game Mode.
Audio Settings
eARC/ARC
The TCL 6 Series/R646 can pass uncompressed audio to a compatible receiver through a single HDMI connection. For eARC to work with Dolby Atmos formats, set Digital Audio Out to 'Auto', and set it to 'Pass Through' for DTS:X formats.
White Balance Settings
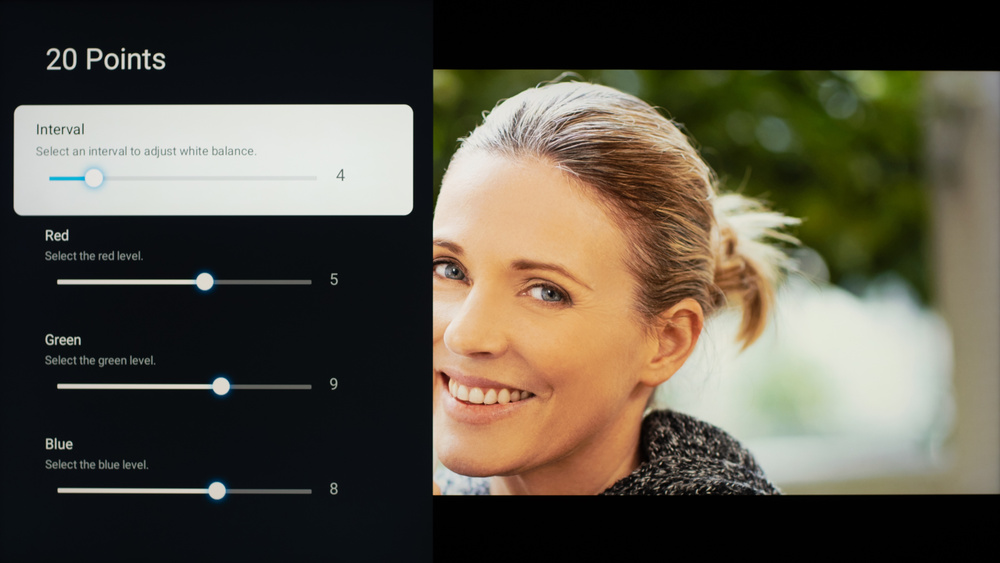
The following are the results of the white balance and colorspace calibration on our unit. They are provided for reference, and should not be copied, as the calibration values vary per individual unit even for the same model and same size as the TV we tested due to manufacturing tolerances. If you want to try them, you will need to enter all values shown, as all of them are active at the same time. If you end up with worse picture quality, simply reset them to the default values.


Recommended Articles


